
Flashing is the thin metal that keeps water out where your roof meets something that is not a roof tile. Think chimneys, skylights, vents, valleys, and the joint where a lean to meets a wall. When flashing fails it lets water track behind coverings and into timber, plaster, and insulation. If you are searching for how to repair flashing on a roof in a practical way, this guide gives you a clear process. You will learn how to spot the fault, which materials to use, the steps for the most common details, and when to call a pro. The advice is written in plain English for UK homes and shaped to meet quality expectations around experience and trust.
What flashing does and why it fails
Flashing has one job. Direct water onto the weather surface so gravity can take it away. It does this with steps, laps, and drips. Flashing fails when any of those parts are missing or damaged.
Typical causes include cracked mortar, slipped lead, broken clips, corroded steel, poor laps, sealant used as a shortcut, and movement in the building that opens gaps. Storms lift ridge tiles and push water sideways into joints. Moss can hold moisture against metal. Age plays a part, especially where thin code lead or mild steel was fitted.
How to diagnose the leak before you climb
You can learn a lot from the room below the leak. A brown ring beneath a chimney often points to failed step flashing or a cracked saddle. A line of damp where a lean to meets a wall suggests a tired apron flashing or a loose wall trim. A wet patch below a skylight can be a faulty flashing kit or a condensation issue, so check for misting in cold weather. In the loft, look for stained rafters and blackened fixings. Track the stain uphill. Water runs downhill then follows timber, so the entry point sits above the visible mark.
Safety first
Working at height needs care. Use a stable tower or a properly footed ladder with a standoff that keeps pressure off the gutter. Wear soft soled shoes for grip. Never step on fragile coverings such as old slate without proper staging. Treat power lines and wet surfaces with respect. If anything feels doubtful, hire a professional. The cost of safe access is cheaper than a fall.
Materials and tools for durable flashing repairs
- Lead sheet in code 4 or code 5 for most domestic work
- Pre formed lead slates for pipe penetrations if you prefer
- Quality lead compatible sealant for expansion joints and trims
- Lead fixing clips or wedges, stainless steel screws and washers
- Lead sheet sealant or patination oil for new lead to reduce staining
- Flashing tape for temporary weathering or low risk junctions
- Replacement step trays and soakers where slates are used
- Angle grinder with diamond blade for chasing mortar joints, or a mortar raker
- Cold chisel, club hammer, lead dresser, bossing stick, snips
- Mortar or lead compatible pointing compound for joints
- Breathable membrane patches, battens, matching tiles or slates
- PPE including gloves, eye protection, dust mask
If the roof uses a proprietary flashing kit for a skylight or metal roof, buy the kit that matches the product and pitch. Using the wrong kit is a common cause of repeat leaks.
How to repair flashing on a roof in five clear stages
Whether you are tackling a chimney, a wall abutment, or a vent, the repair follows the same logic.
Expose the joint
Lift the tiles or slates around the detail so you can see the full flashing and the underlay. Remove loose mortar and any failed sealant. Brush away dust and moisture.
Check the substrate
Flashings keep water out, but the underlay and battens must also be sound. Replace rotten timber. Patch damaged membrane with lapped underlay and tape before you refit metalwork. Small tears left in place will let driven rain past the strongest flashing.
Replace or refit metal with correct laps
Water needs a path that never lets it turn uphill. Maintain minimum laps of 100 millimetres on slopes of 30 degrees or more. On low pitches, increase the lap. Dress lead without stretching it thin. Avoid large single pieces. Several smaller lengths with laps perform better because they allow movement. Fix clips rather than pinning lead tight.
Rebuild the covering
Refit soakers, step trays, or tiles with correct headlaps and side laps. Match gauge on battens. Tie in with any proprietary pieces such as verge caps or ridge systems. Use stainless fixings and replace cracked tiles.
Finish joints and test
Point chase joints with lead compatible compound or well mixed mortar. Apply patination oil to fresh lead. During light rain, or with a controlled hose test from the eaves upward, confirm the joint sheds water cleanly. Never drive water uphill during a test.
Step by step for the most common flashing repairs
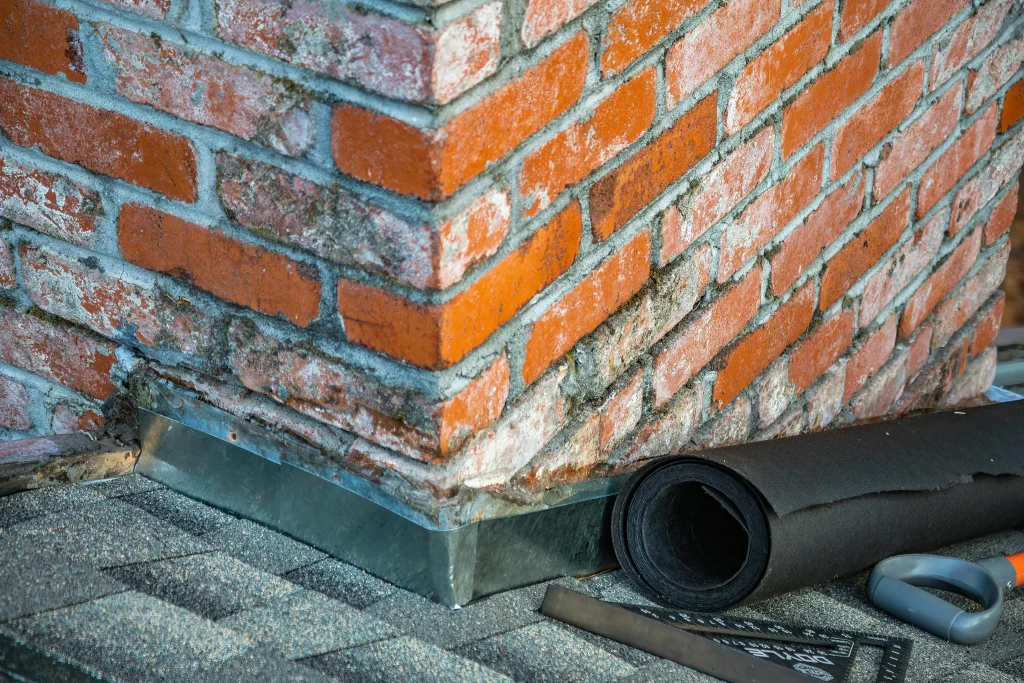
Chimney side flashing with steps and soakers
- Lift two or three courses of tiles or slates along the chimney side.
- Remove failed mortar from the brick joints you will chase. Aim for a uniform slot about 25 millimetres deep.
- For slates, install individual lead soakers above each course. For tiles, use stepped lead that overlaps at each riser.
- Set the new step flashing into the chase and hold with lead wedges. Maintain at least 75 millimetres of upstand on the brick side and 100 millimetres of cover over the soaker or tile.
- Dress neatly to follow the profile. Avoid sharp creases that can split later.
- Point the chase with suitable compound or mortar and tool to a neat finish.
- Refit slates or tiles, check gauge, and clip where required.
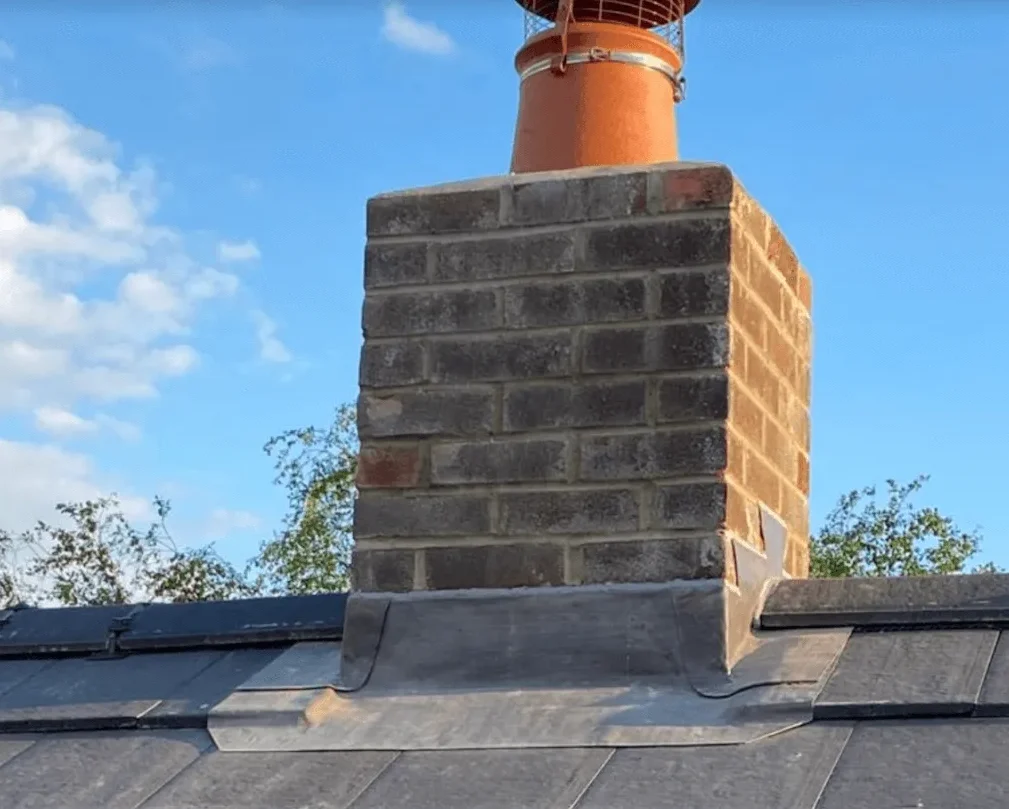
Chimney rear saddle and apron
- Remove the top courses behind the stack to the ridge line if needed.
- Form a lead saddle that bridges the rear of the stack and turns down over the roof covering. The saddle should sit under the ridge where possible and lap the side steps.
- Fix with clips, not nails through the lead in water paths.
- Dress the saddle gently so water splits to both sides and cannot pool behind the stack.
- At the front of the stack, fit an apron that tucks into a chased joint and drips over the tiles. Keep the drip edge clean and straight.
Abutment wall on a lean to or extension
- Strip back a few courses of tiles along the junction.
- If existing flashing is one long piece of lead, plan to replace with stepped sections to manage movement.
- Chase out mortar joints in a stepped pattern that follows tile courses.
- Fit stepped flashing pieces with 100 millimetre cover onto the tiles and at least 75 millimetres into the wall.
- For very low pitches consider a secret gutter or a proprietary abutment system to increase capacity in heavy rain.
- Rebuild the tile courses, check headlaps, and tie any underlay trays into the gutter.
Skylight flashing kits
- Confirm the make, size, and roof pitch, then buy the matching kit for tile or slate.
- Strip the area to the rafters around the opening. Check trimmers for staining or decay.
- Fit the underfelt collar and insulation collar supplied by the manufacturer. These pieces control water and limit condensation around the frame.
- Install side, bottom, and top flashings in the order given in the manual. Maintain laps and engage side steps fully.
- Re tile with cut pieces that support the top flashing neatly.
- Test with a controlled flow from the top of the window, not from the sides.
Pipe penetrations and vents
- Replace tired rubber with a lead slate or a modern EPDM slate set on a rigid base.
- Dress the apron over the tiles below and bring the top of the slate under the course above with a healthy lap.
- For metal flues follow the appliance maker’s clearance and temperature rules. Some require specialist flashings and fire safe collars.
Valleys
- Valleys carry a lot of water. Do not rely on sealant as a fix.
- Lift tiles a metre either side of the valley line.
- Replace split or corroded metal with new pre formed trough sections, or consider a GRP valley system that is compatible with your tiles.
- Maintain correct tile cuts, keep a clear water channel, and avoid pushing mortar into the trough.
- Refit tile clips so wind uplift does not push cut edges into the flow.
Temporary fixes that buy you time
If a storm opens a joint and you need an immediate patch, flashing tape can hold for a short time. Clean and dry the area, apply the tape with a roller, and check the edges are sealed. Use this as a stopgap only. Plan a permanent repair with proper metal, laps, and chases as soon as possible.
Flashing Repair Costs to expect in the UK
- Real numbers depend on height, access, materials, and the length of the joint. These guide ranges help with planning.
- Small repoint of a chased lead joint. £80 to £180
- Replace a short stepped flashing run at a wall. £250 to £500
- Chimney side steps and front apron. £350 to £700
- Full chimney flashings including rear saddle. £600 to £1,200
- Skylight flashing kit replacement, labour and finishing. £300 to £700, plus the cost of a new roof window if required
- Valley reflash with GRP or metal on one run. £450 to £900
- Access equipment such as a tower or scaffold lift. £150 to £600
Ask for itemised quotes that show access, metal gauge, length, and any making good to tiles, underlay, or plaster.
Common mistakes that cause repeat leaks
- One piece lead along a long wall that splits with expansion and contraction
- Tiny laps that let driven rain run uphill under the joint
- Nails through the water path rather than using clips
- Sealant smeared onto old lead instead of a chased joint
- Flashing kits that do not match the roof covering or pitch
Missing underfelt trays at abutments so water runs behind the gutter
Poor tile gauge around the detail which breaks side laps
Use this list to check any method statement before work begins.
When to repair and when to replace
Repair is sensible when metal is sound, laps are short, or mortar has cracked but the basic detail is correct. Replace when the flashing is undersized, corroded, punctured, or built with the wrong system for the roof pitch. Replace if a skylight uses an incorrect kit or if a chimney has no proper rear saddle. Rebuilding once to the correct standard is cheaper than chasing small leaks for years.
Maintenance that extends life
- Keep gutters and valleys clear so flashings are not submerged during heavy rain
- Treat new lead with patination oil to limit runoff stains on tiles and brick
- After big winds, take a ground level look for lifted tiles near flashings
- Remove heavy moss that holds moisture against metal
- Photograph tricky details each year. Comparing shots makes it easy to spot movement
Frequently asked questions about how to repair flashing on a roof
Can I point over loose lead and stop the leak?
Pointing alone will not hold if the flashing is loose or lacks a chase. Fix the metal correctly first, then point for a tidy seal.
Is code 4 or code 5 lead better?
Both are used on domestic roofs. Code 4 suits many step flashings and aprons. Code 5 is thicker and is often chosen for longer pieces like a chimney saddle. Follow manufacturer guidance and avoid over large pieces that cannot move.
Can I use flashing tape as a permanent fix?
It is fine as a temporary weathering, but it does not match the life of metal in exposed locations. Plan a permanent repair with proper laps.
My skylight leaks at the corners. Do I need a new window?
Not always. Many leaks come from the wrong flashing kit, poor laps, or missing collars. Rebuilding the kit correctly often solves it. Replace the window if the frame is warped or the glazing seal has failed.
Do I need permission for flashing work?
Like for like repairs on a normal house usually sit within permitted development. If the building is listed or in a sensitive area, check local rules before altering visible features.
Simple checklist you can copy for your job file
Photos of the leak area inside and outside
Short description of the suspected cause
Quote that lists access, metal gauge, length of run, laps, and making good
Start date and weather plan
After photos and a short note on what was done
Warranty and product data sheet for any kits
This record helps if you sell and it makes future maintenance easier.
Book a clear survey and an itemised flashing repair with LD Roofing
Ready to sort a leak with a proper fix. LD Roofing will inspect from the roof and the loft, photograph every junction, and explain how to repair flashing on a roof in your specific case. We rebuild step flashings, form neat chimney saddles, refit abutments, replace skylight kits, and correct valley details. Every quote is itemised so you can see where each pound goes. If you are searching how to repair flashing on roof, or you are local to Northamptonshire, Bedfordshire, or Buckinghamshire, give us a call and we will measure properly, show you what we find, and give you a fixed proposal with clear timelines. Call 01604 372453 or use our online enquiry form to book your survey and request FREE quotes.